How to Create a Panelboard Schedule
-
Select
 (Setup
Distribution/Panel).
Opens the
Object Properties ‹Distribution Properties› dialog.
Enter Distribution name and select
Type (here:
Distribution).
(Setup
Distribution/Panel).
Opens the
Object Properties ‹Distribution Properties› dialog.
Enter Distribution name and select
Type (here:
Distribution).
Clicking Link... opens the Link Panel dialog.
- Select L+P Wiring from the Panel type pull-down menu. Click New. Opens the Panel Properties dialog.
- Enter the settings shown below in the Panel Properties dialog.
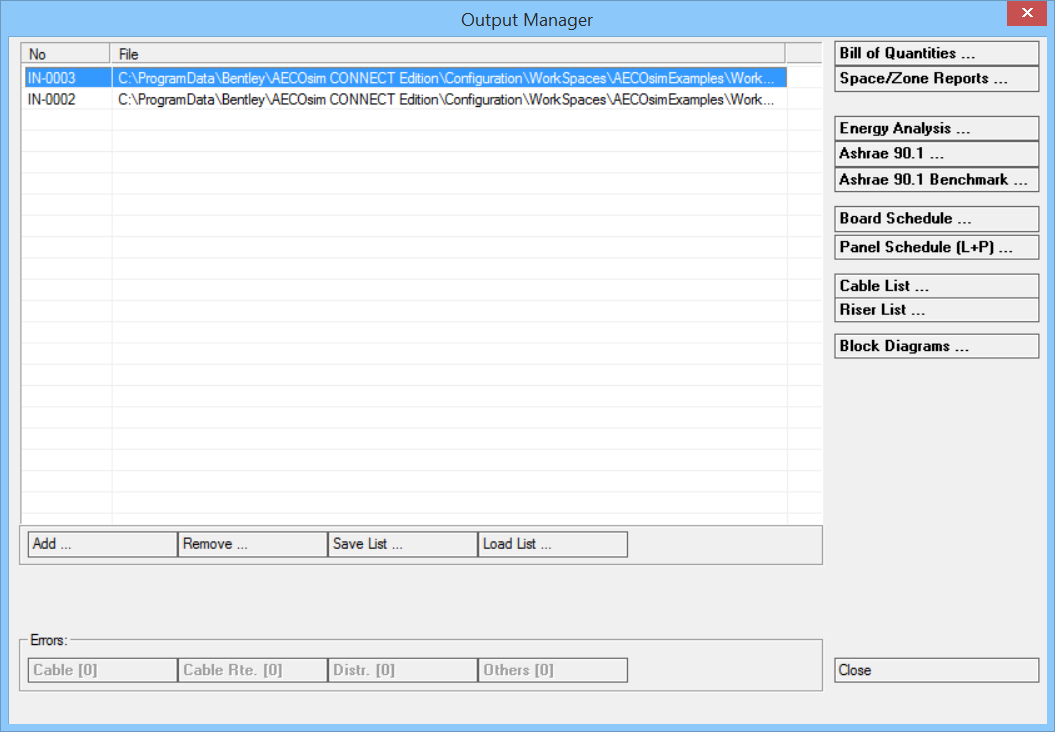
-
Select
 (Output Manager).
The
Output Manager dialog opens.
(Output Manager).
The
Output Manager dialog opens.
- Click Add and select current drawing. Click Spaces/Zone Reports to create reports.
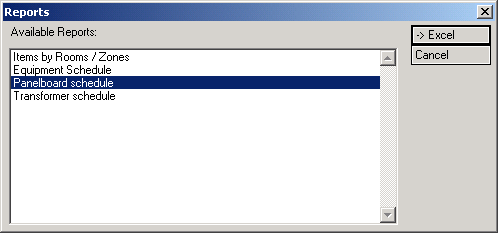
- Select all rooms in the Rooms / Zones dialog. Check the Detailed, by room/zone in the Options settings and click OK. The Reports dialog opens, listing types of reports.
- Select Panelboard schedule in the Reports list and click > EXCEL. The Panelboard schedule report is generated.


 (
(